This is a simple, straightforward waggler rig that will catch fish from stillwaters, canals and rivers. It’s the basic float rig that every angler ought to know how to tie.
The float is locked onto the line using a silicone float adaptor (these allow a quick change of float whenever required) and is locked in place using the vast majority of shot either side of the adaptor.
You’ll find the number and sizes of shot needed to cock the float printed on the side of the float. This will give you a guideline as to the amount of shot needed.
Next place a few much smaller dropper shot just below mid-depth (a few No6 or No8 shot will ideal).
After this place another two or three No8 shot equally spaced between the last shot and the hook. These will provide a slow and gentle fall of the bait through the last few inches of water.
You will need to plumb the depth really carefully so you know how deep to set the rig, and aim to set the rig 4-6in overdepth so that the bait settles on the bottom.
Most fish feed on the bottom, so this is a good place to start presenting your bait.
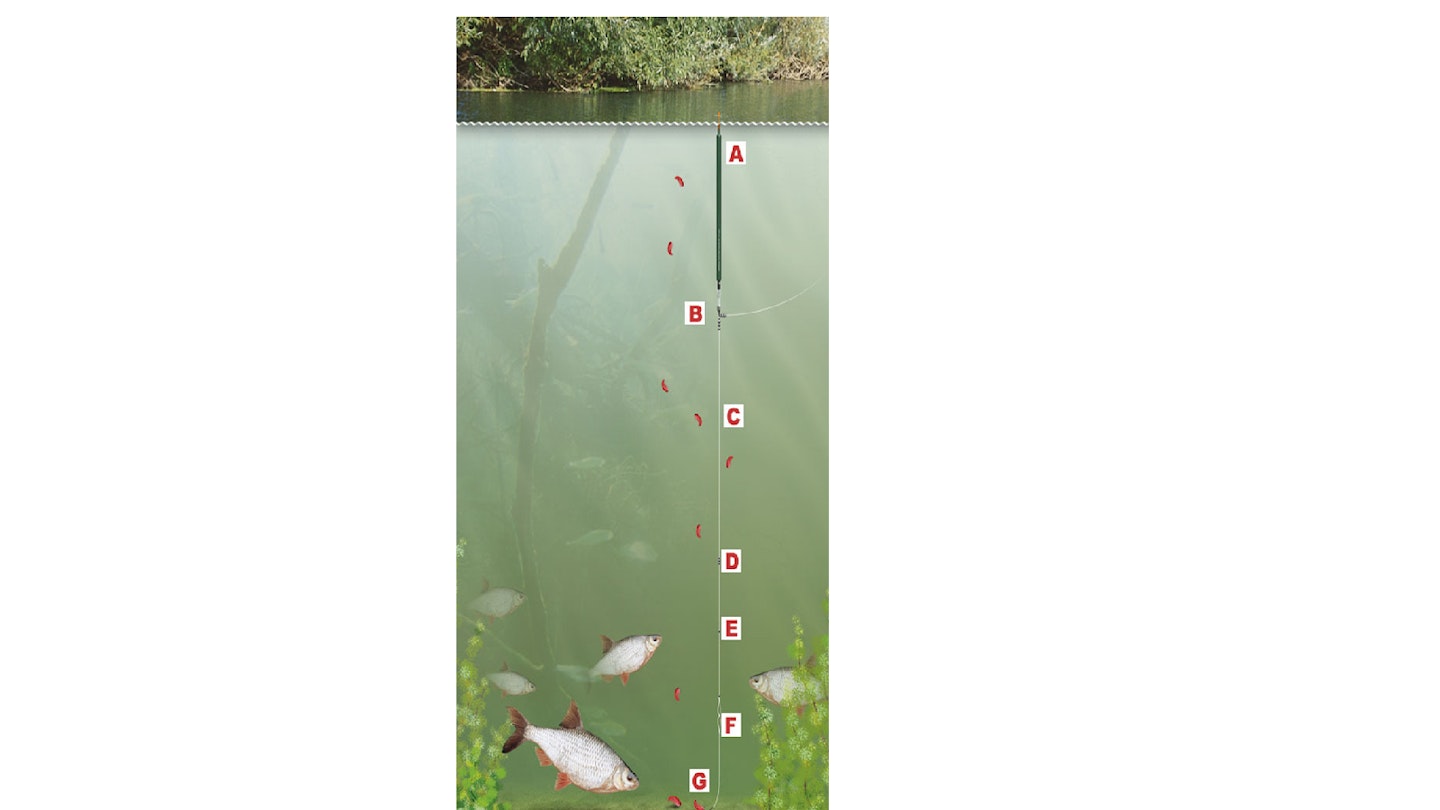
A Add enough shot to the rig so that your float’s sight tip just breaks the surface.
B Use a silicone float adaptor to attach the float onto your line, and lock the float in place using the vast majority of shot.
C Your strength of line needs to match the species of fish you are likely to catch. For small fish use between 2.5-4lb, and for carp use between 4-8lb.
D This group of No6 or No8 shot need placing just below mid-depth.
E Spread two or three No8 shot equally between the last group of shot and the hook.
F Your hooklength needs to be slightly weaker than the mainline so if a breakage occurs, it will occur here and not on your main rig.
G Aim to present your baited hook on the bottom at the start of the session as it’s here that most fish will feed. Present the bait between 4-6in overdepth at the start.
